
Tricky!
The chain by it self can be done with no problem, work ring that the bead fits in (some prior tests needed), close ring, place bead, make lock join or instead of making the join, pull a loop, start the new ring (make sure the the free part of the ring stays under, otherwise you will not be able to close this ring):

I also applied the same technique for the 2 pearls from the bottom of this necklace. This time I made the rings a bit smaller and placed the pearl on top of the lace. Pretty nice effect.

I tried hard to make a combination between the beaded chain (with the collar) and the bead on top. Did not work. I tried to change the order of working the rings, to make all kind of joins, passed the shuttle in various ways, let it fall. It is not working. And you will see why.
I made a very quick tutorial for the beaded chain but with the bead between the rings. This is for you, Jaden, maybe the bracelet will turn out like you would like it.
Fill your shuttle and string the beads. I used baby blue seed beads between the rings, and purple ones in the rings. But you can also use 2 different sizes of beads, add beads on the chain...

Work a ring. Up to you how many ds. Bring the bead you want to place between the rings.

As close as possible from the bead, work the next ring (with the vsp); this time your next bead has to fit in.

Work the collar ring as big so the bead gets in it. Make sure you have the starting/closing point of this ring on the backside of the work.
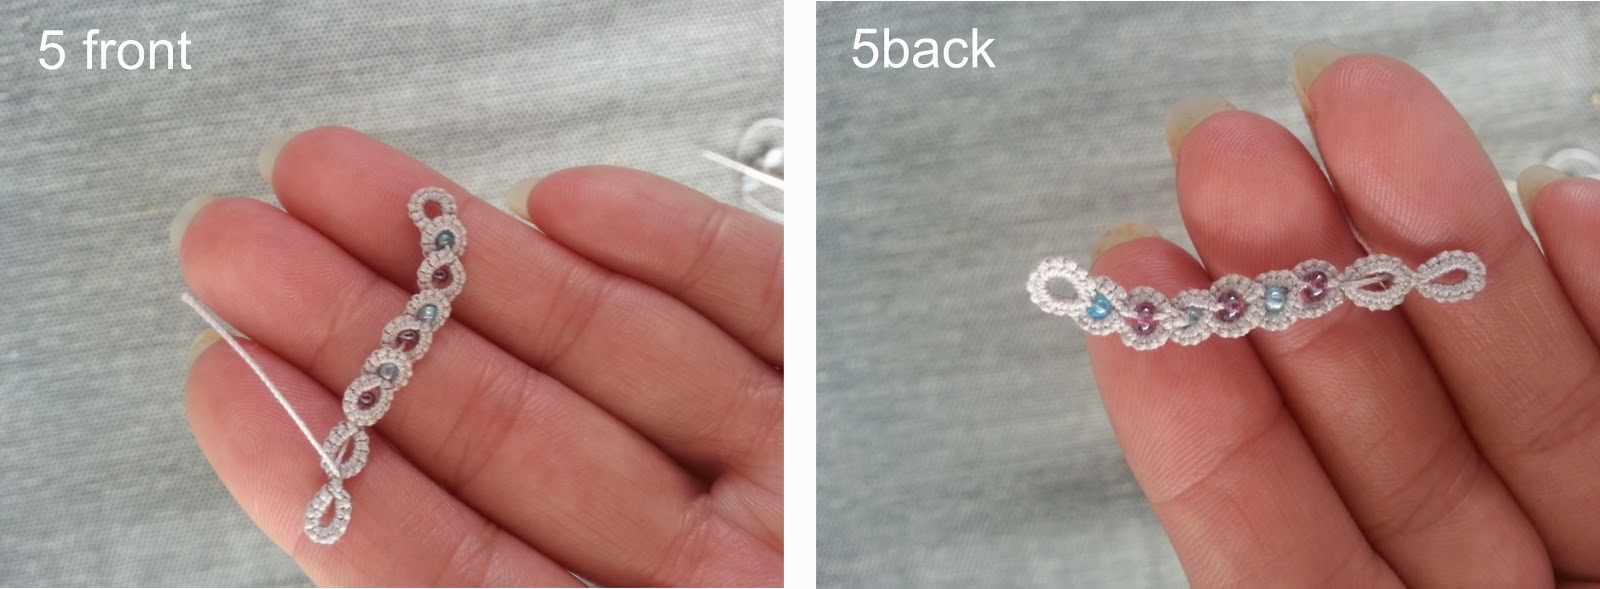
As you see, on the front side it will tend to "embrace" the bead, on the back side it will tend to stay on top of the bead.

Make the join to fix the bead in place.
Repeat the sequence for the desired lenght.
The last non-beaded rings are my some of my tests to work the rings differently or to make another join. Why it will not work? look the back side: the purple bead gives a "lift" to the horizontal ring. If you try to change the sequence, it will not hapen or the appearence is not the same.
Back to Jaden: 1 thing I did not test yet: work the collar, do not close the ring, prepare a join so the thread remains in the middle of this ring but on top of the ring of the chain, then carefully close the ring, finish the join and place the bead. Gave it shy try yesterday, got my fingers and nerves lost between thread, crochet hook, shuttle and fingers.
Happy tatting.
If someone smarter and more stubborn than me finds a solution to Jaden's riddle, may I know it too? Thank you!
this is really nice demonstration and I need to make a little chain for a small hook I have and this would go well on a chatelaine, thank you!
ReplyDeleteHave fun with it. It is nice to tat and it goes pretty fast.
DeleteThank you so much for the tutorial. With the photos it is much easier for me to understand - and how easy it is to do! I'm just too much of a visual person and that is very helpful. So again:
ReplyDeleteThank you! :)
Jaden