I do have a huge shortage in time. I do not have the time to make a tatting tutorial the way I like it.
Lately I made some baubles. But one of the patterns used especially is pretty versatile.
I will post the picture and the written pattern. It is a very easy one. No idea, I may have been seen something similar. Anyway, did not copy voluntarily anyone. If so, Please let me know.
You can work it with a shuttle and a ball, CTM, of course. I prefer though the 2 colours version. No trick, simple sequence ring, chain, ring.
I worked this patterns with a Penny 30 thread and Finca Metallic thread (really fine one). Yes, I am not afraid to mix the threads sizes, the effect is always rewarding. So, please adjust your ds accordingly. All the picots are very small picots.
The only difficult step is the start: with a chain with a paperclip.
Place the paperclip, start chain: 10 - 19 - 1, snug, turn work.
* Ring 1: 10 + (remove paper clip, make join) 9 - 1, close, do not turn work.
R2: 1 + 9 -10, close, turn work.
Ch: 1 + 18 -1 snug, turn work.
Work trefoil:
R: 10 + 6 - 4, close, dnt
R: 4 + 10 - 10 - 4, close, do not turn
R: 4 + 6 - 10 close turn work.
Ch: 1 + 18 - 1, snug, turn work.
R: 10 + 9 - 1, close, do not turn work.
R: 1 + 9 - 10, close, turn work.
Ch: 1 + 19 - 10, make lock join to the last ring.
Continue Ch: 10 - 19 + 1, snug, turn work. *
Repeat from * to *.
When you got the desired length, cut and work the second half, joining chains at the remaining picot.
You will get this. Bookmark, bracelet, also good.
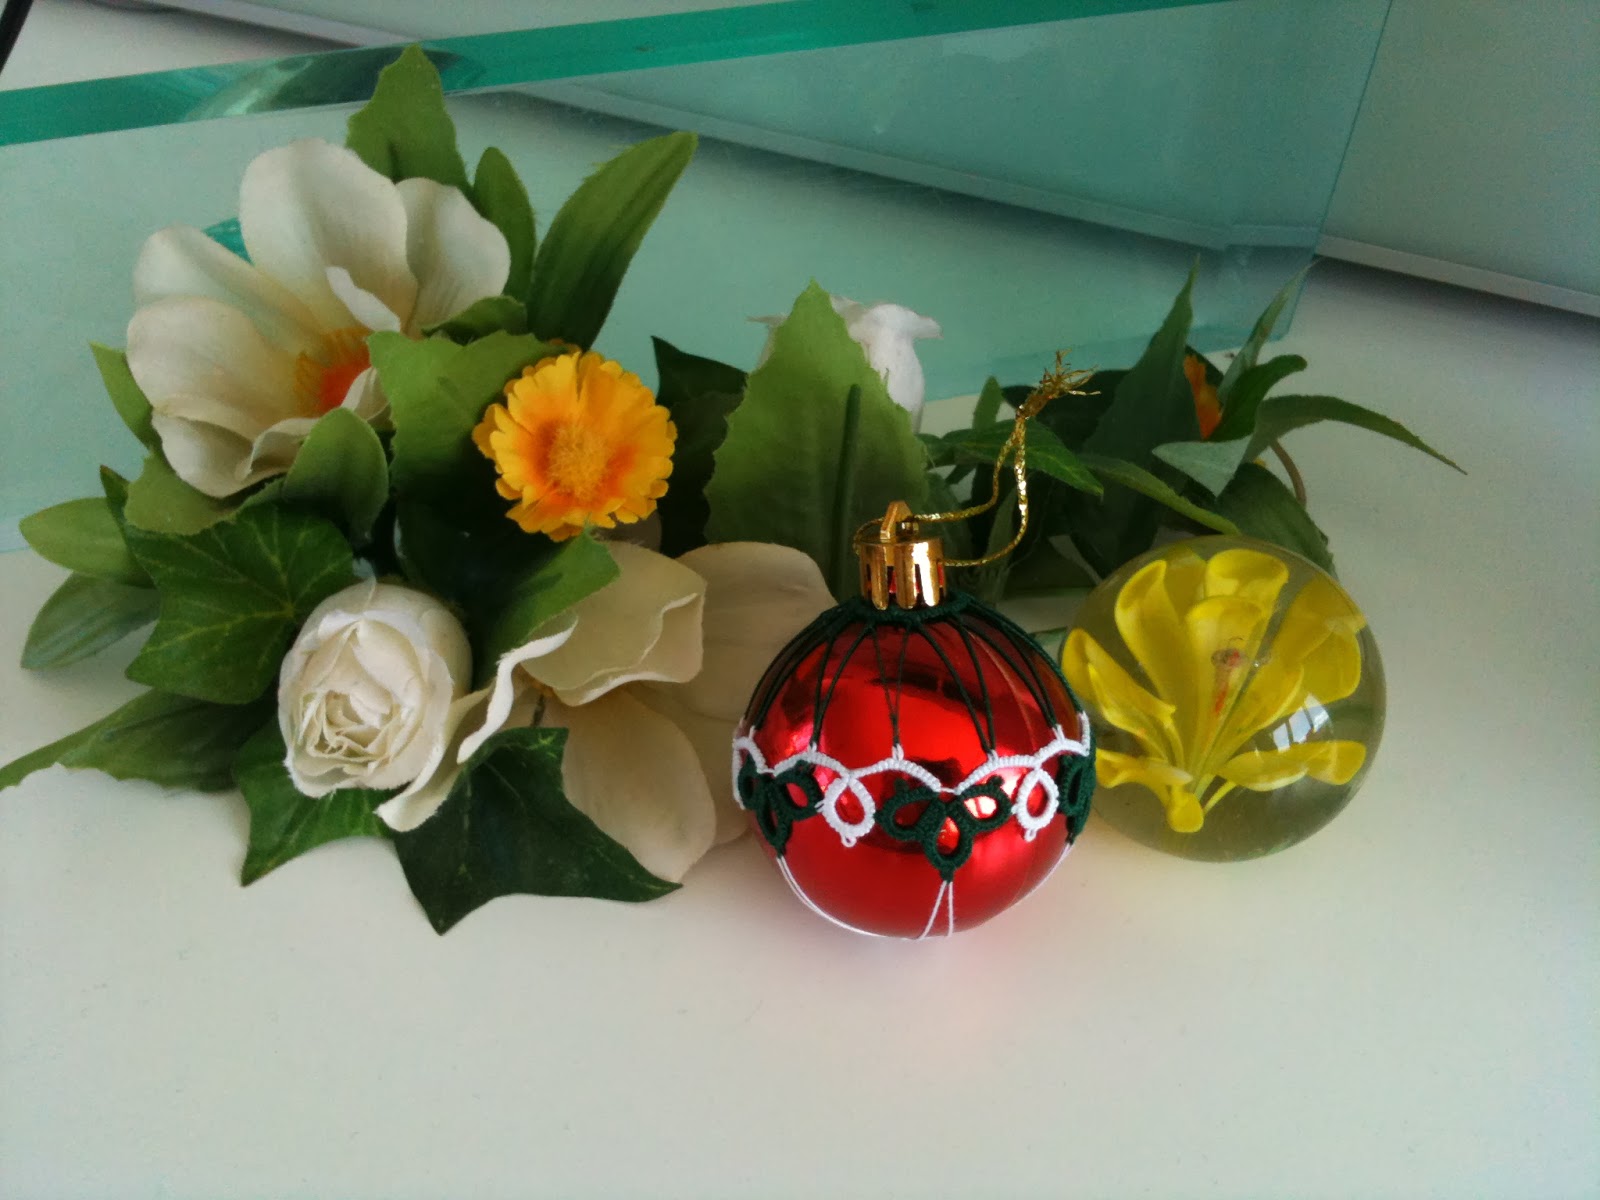
For a 3 cm diameter baulbe: 4 elements were enough. I closed first the lower part with a ring (I think there were 6 or 8 ds between the picots from the trefoil). To close the motif on the bauble: just passed a thread through the picots and snug.
For a 6 cm diameter, I used 5 elements.
For a 8 cm diameter I placed the lace vertically, and fasten both ends. I made also 2 flowers and sewed the elements together.
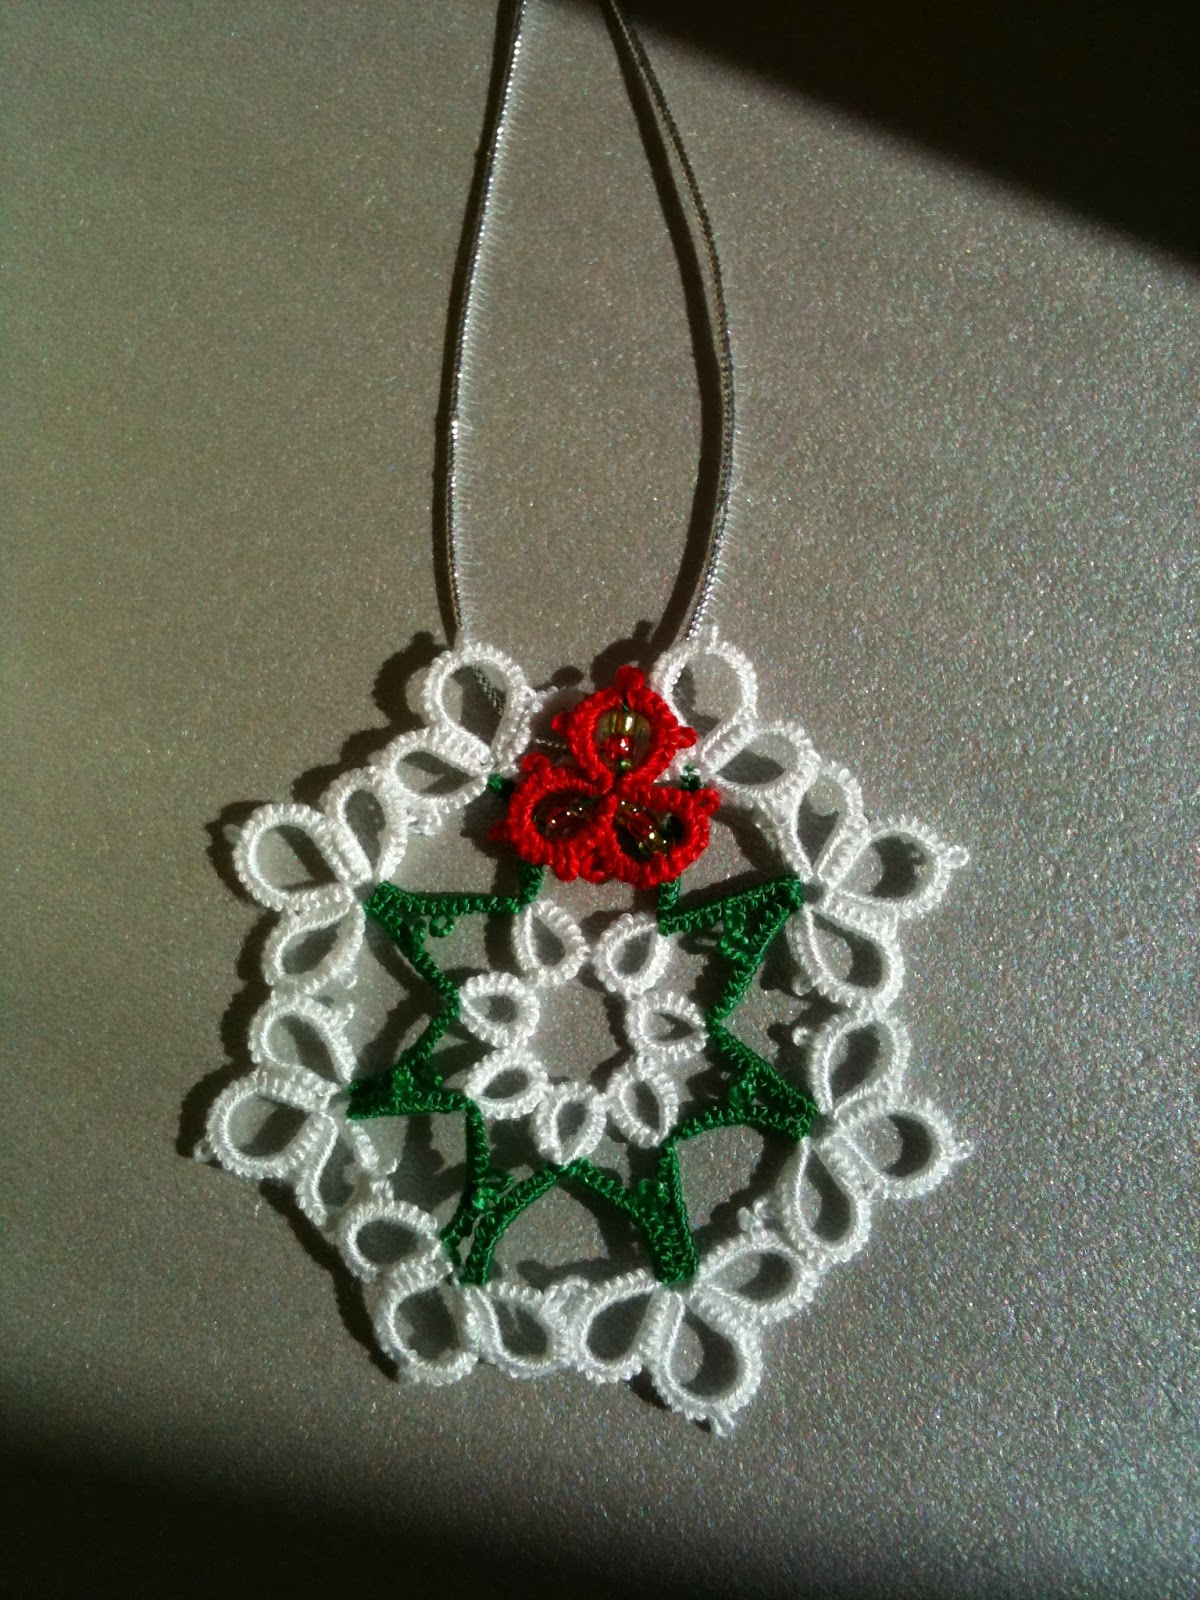
Why did I say that the pattern is versatile? well... If you join the picots with a flower or a ring and if you stiffen the lace with an inflated balloon, you will get a lace bauble. I tested it, it works. If you work 4 elements, you will get a nice cube.
If you work only a half of the stripe with 5 or 6 elements and join the upper picots of the trefoils with a flower, you will get a star or a snowflake .
Have fun. I know I did.
Showing posts with label snowflake. Show all posts
Sunday, December 13, 2015
Sunday, January 26, 2014
Bugle snowflake
Do you remember the snowflake with bugles? If not, I help you, it was in this entry from November. The tattter attending the on-line tatting classhaev already a clue why I feel like coming back to this entry. This snowflake is part of the lesson fromt he 27th of November. Reason? Working with bugles.
Actually it is not that difficult. Just imagine you work with more than 2 seed beads. I admit, not that versatile, but definitelly, a lot of possibilities.
After you make the final chain, make a lock join and start the round 3 with a chain.
Turn work, take shuttle 2 and make the trefoil Then the chain, make lock join...
Actually it is not that difficult. Just imagine you work with more than 2 seed beads. I admit, not that versatile, but definitelly, a lot of possibilities.
For a start: there are at least two tatting designers who worked with bugles. One is Frivole the other one is Sabina Carden-Madden. Sabina's wonderful candle snowflake is here.
As for mine, I decided to make a sort of step by step turorial, at least for the critical phases of the nowflake.
To begin with, there are 2 sizes a bugles, I used the 5mm ones. And there are normal bugles and the swirled ones (wich have a beautiful effect, on the tatting). Since they are so long, only one of them get on a fine crochet hook. This is the reason I use my "magic broken guitar string".
Do you remember the pattern of the snowflake? 3 rounds.
All you need: 2 shuttles (CTM if possible), 2 paper clips, this string, a hook.
After the first one (just a ring with 5 picots with 3 ds in between.
Round 2: start SR: Shuttle 1: 6 ds 2 bugles picot (secured with paper clip), 3 ds
Shuttle 2: 6 ds long picot (made with the thread from the shuttle), 3 ds, close ring.
Now do not turn, make the 16 ds chain.
Turn work, start ring: 3 ds remove paper clip from the long "bugled" picot, make join, work 6 ds, join the the nest picot from the first round, 6 ds, make new long picot, 3ds close.
After this, you just repeat the sequences (chain 16, rings).
After you make the final chain, make a lock join and start the round 3 with a chain.
Turn work and start ring with the first shuttle: 6ds, join in between the bugles, 6ds, close.
Turn work, take shuttle 2 and make the trefoil Then the chain, make lock join...
Do you remeber about the swirled bugles I was talking about at the begining? This is the effect:
These are just tests. I should make an entry only for the bugles in tattig. Tomorrow. Promise.
Have fun.
Saturday, December 7, 2013
Snowflake swirl
Got the simpliest pattern ever and played with ds combinations. Added some sparkle to it with some seed beads. Now I have a cute, easy-to-do snowflake. I guess, after Christmas I will just refuse to tat with white thread. Until then, I still have to do it.
When I say that I combined the ds, I mean that I just added to a normal 10ds chain 3 times the sequence of 8 half stiches. Yup, the Josephine chain thingy. As simple as that: 8 hs, pass the shuttle over the theard, work the next 8 ones... and so on. Foir my Frecia 12 thread, 8hs did it ok.
I used 2 shuttles for 2 reasons: the ring on top of the chains and the fact that when I was working the Josephine chain I noticed that the thread was twisting, so I had to unwind. No real need for the second shuttle to make the floating ring, but I dare you to do unwind the thread of a bal (without placing everytime a clip... ) and loosing time.
So.
Start ring: 10 - 10, close, turn work
Start chain: 10 ds, make the Josephine sequence, do not turn work.
Take the second shuttle, make the floating ring: 12ds, close, do not turn work.
Take the first shuttle, make the Josephine chain section, 10 ds, lock join to the picot of the first ring.
Start ring.. Repeat until the star is done.
When i finished, I let a bit of more thread to sew my seed beads.
I kind of like the combination of the 2 chains toghether. The normal one makes a nice arch, the Josephine chain gives a nice pointy touch. My TOR are a bit bigger than in the given pattern. Feel free to change the amount of ds as you like it better. Nothing can go wrong.
Talking about learning: My husband asked: "Can't you make a snowflake more like a snowflake?" When he draw it I froze: RING ON RING! I searched, I found it, I made some practice of the LTROR (Thank you, Karen,.. again and again) ... As scarry as it is at the first glance, when you have the shuttles in the hands it makes more sense. Got it. Brave (or stupid) as I am, I added beads on the thread... My first piece gave me some trouble, but I managed to finish it: it really sparkles in the light:
Now I just have to put some starch on this one.
Sunday, November 24, 2013
Learning, testing, tatting
Claudia Meza posted during the last week the Christmas Berry wreath of LaRae Mikulecky and challeged us to make it.
Looked at the pattern, I admit, not to much at the text, mea culpa. Big mistake.
I tried to tat it, not that difficult. The first round came up pretty well, I got some pretty decent Josephine knots:
Looked at the pattern, I admit, not to much at the text, mea culpa. Big mistake.
I tried to tat it, not that difficult. The first round came up pretty well, I got some pretty decent Josephine knots:
It was any way a test, only 8 rings and I did not pay to much attention at the picots (do not like them too much, anyway).
After the first outer chain I stopped. Dit not like it at all. Instead of a nice, continuous chain I had 2 chains, both with own will. See? Clumsy!
What I did was turn the work to make the JK, it seemed logical to me.
Some days later I got a precious hint from Ladytats (you really must see her version!) : do not turn the work to tat the Josephine knots for the outer chain and some other small tricks. And IT HELPED! Thank you soo much!
Still a lot to improve, especially when making the picots before or after the JK, but it works:
Tatted this time with Anchor (my order for Lizbeth got somehow lost in transition... some sticky hands in the customs, I guess). It is the same 12 Anchor, but obvioulsy the red thread is thicker than the green one.
During the days I had to take my mind away from the first "tatting disaster" I fooled around and I came up with this little something. I think it will end as a medallion or a bell... Have to see. And definitelly, for the last ring I have to re-think... First the chain and then the ring, like this I will have a better symetry for a bell. Do not look too much at the center, it was a test of, let's say, "mixed media".
And I played with the snowflake with bugles, have to work a bit more, re-think the ds count, because it needs help to lay flat. Added the green seed beads on the second shuttle and played: I rushed, of course, like for all my tests, and one bead remained without the outer chain:
Wednesday, November 20, 2013
Snowflakes this time
I got into the Christmas fever. Last week I went to a small craft fair here, in Puerto de la Cruz and I found out the conditions to present there my work. Nothing so scarry. But I only need to tat some more little things at least as duplicates. This week end will not hapen, but the next ones I want to go... Unlike most of you, I never saw the reaction of actual people in front of a table full of tatting. Would they even stop in front of it?
Since Christmas is almost here, I really have to rush with this kind of pieces.
I will have to re-do some of the ones from last year. It is crazy how long they can take to make a decent amount of them!
The last ones you maybe know already. I am not quitet anymore about what I do.
For this one, you have the pattern here, in the blog:
For this one, there is my ETSY pattern:
Since Christmas is almost here, I really have to rush with this kind of pieces.
I will have to re-do some of the ones from last year. It is crazy how long they can take to make a decent amount of them!
The last ones you maybe know already. I am not quitet anymore about what I do.
For this one, you have the pattern here, in the blog:
While making a test with this pattern, with green thread this time, some more size 15 Toho beads, I decided that I can try to make some funny xmas earrings. They need some more pearls or cristals... But they look festive.
For this one, there is my ETSY pattern:

As for this little one, I used a patchwork button, poinsettia flower... It misses a bit of red or some glitter thing, have to think about it. I thought even that is would have a nice apearence on an organza present bag.
Subscribe to:
Posts (Atom)