Pages

Thursday, December 19, 2013

Pattern for Nicole

Definitelly, writing a pattern takes a lot less than the tatting of the same piece, I count here also the miss-tatts for a piece one makes for the first time.
I got bored of snowflakes. They are all beautiful but I was missing my pieces.
I had an idea haunting me since quite a while: to combine the tatting with beads with the Ankars. You can say it is nonsense, it is already done, Ankars is anyway tatting with beads. And you may be true, I could not say, I did not find in the little information about the AnkarsI found this kind working with beads.
Neverdeless, I worked this necklace with those 2 ideas combined. The white pearls are tatted in, the rest is sewed in. I could have added the small Toho 15 sead bead while tatting. Next time.
You may say it is inspired from the work of Maranta. It is not. When you will see the pattern, you will see why. 

The lace
I worked this one with poliester thread (size 40) from Brildor, strand of 3.
2 shuttles, white 3 mm pearls, paper clip.

You will have to be accustomed to work with pearls/beads secured with paper clip, so make sure you have what you need at hand. One element of the pattern, with my thread measures 3,5 cm. You will have to count 2 pearls for each element. You will work the desired lenght, so you will have to prepare the necessary pearls.
In the pattern I marked with green the bigger ring to make it easier for the count of the doubles stiches. It has no relevance for the motiv.

Start ring: 15ds place pearl, secure with the paper clip, 15 ds, close.
Start ring underneath the smaller ring: 15 ds join to the pearl, 10 ds place next pearl with paper clip, 25, close, turn work.
Chain: 35 ds (or as long as you like it to go around the bigger ring), remove the paperclip, make lock join.
Start chain: 10 ds, turn work.
Start ring: 7 join to the previous join (above the pearl) , 4ds – 3 ds, close, do not turn work.
Start ring: 3 + 7 + (at the other side of the pearl) 12 – 3, close, do not turn work.
Start ring: 3 + 4 – 7, close, turn work.
Chain 10 ds, lock join at the free picot from the trefoil.

Start over.  

You will want to let the picot where you place the second pearl a bit looser... after all, you will have to make 2 joins from 1 side and and 1 other one on the other side of the pearl. Like this the chains do not overlap the rings. 
If you encounter some problems in working the pattern, just let me know. 

The beads
This is up to you completelly. I choose Christmas theme, but sky is the limit with the colour combination. 
Have fun with it. 

Saturday, December 7, 2013

Snowflake swirl

Got the simpliest pattern ever and played with ds combinations. Added some sparkle to it with some seed beads. Now I have a cute, easy-to-do snowflake. I guess, after Christmas I will just refuse to tat with white thread. Until then, I still have to do it.

When I say that I combined the ds, I mean that I just added to a normal 10ds chain 3 times the sequence of 8 half stiches. Yup, the Josephine chain thingy. As simple as that: 8 hs, pass the shuttle over the theard, work the next 8 ones... and so on. Foir my Frecia 12 thread, 8hs did it ok.

I used 2 shuttles for 2 reasons: the ring on top of the chains and the fact that when I was working the Josephine chain I noticed that the thread was twisting, so I had to unwind. No real need for the second shuttle to make the floating ring, but I dare you to do unwind the thread of a bal (without placing everytime a clip... ) and loosing time.


So.
Start ring: 10 - 10, close, turn work
Start chain: 10 ds, make the Josephine sequence, do not turn work.
Take the second shuttle, make the floating ring: 12ds, close, do not turn work.
Take the first shuttle, make the Josephine chain section, 10 ds, lock join to the picot of the first ring.

Start ring.. Repeat until the star is done.

When i finished, I let a bit of more thread to sew my seed beads.


I kind of like the combination of the 2 chains toghether. The normal one makes a nice arch, the Josephine chain gives a nice pointy touch. My TOR are a bit bigger than in the given pattern. Feel free to change the amount of ds as you like it better. Nothing can go wrong.

Talking about learning: My husband asked: "Can't you make a snowflake more like a snowflake?" When he draw it I froze: RING ON RING! I searched, I found it, I made some practice of the LTROR (Thank you, Karen,.. again and again) ... As scarry as it is at the first glance, when you have the shuttles in the hands it makes more sense. Got it. Brave (or stupid) as I am, I added beads on the thread... My first piece gave me some trouble, but I managed to finish it: it really sparkles in the light:


Now I just have to put some starch on this one. 


Sunday, November 24, 2013

Learning, testing, tatting

Claudia Meza posted during the last week the Christmas Berry wreath of  LaRae Mikulecky and challeged us to make it.
Looked at the pattern, I admit, not to much at the text, mea culpa. Big mistake.
I tried to tat it, not that difficult. The first round came up pretty well, I got some pretty decent Josephine knots:
 
 
It was any way a test, only 8 rings and I did not pay to much attention at the picots (do not like them too much, anyway).  
After the first outer chain I stopped. Dit not like it at all. Instead of a nice, continuous chain I had 2 chains, both with own will. See? Clumsy!


What I did was turn the work to make the JK, it seemed logical to me. 
Some days later I got a precious hint from Ladytats (you really must  see her version!) : do not turn the work to tat the Josephine knots for the outer chain and some other small tricks. And IT HELPED! Thank you soo much!
Still a lot to improve, especially when making the picots before or after the JK, but it works: 
Tatted this time with Anchor (my order for Lizbeth got somehow lost in transition... some sticky hands in the customs, I guess). It is the same 12 Anchor, but obvioulsy the red thread is thicker than the green one. 

During the days I had to take my mind away from the first "tatting disaster" I fooled around and I came up with this little something. I think it will end as a medallion or a bell... Have to see. And definitelly, for the last ring I have to re-think... First the chain and then the ring, like this I will have a better symetry for a bell. Do not look too much at the center, it was a test of, let's say, "mixed media". 
And I played with the snowflake with bugles, have to work a bit more, re-think the ds count, because it needs help to lay flat. Added the green seed beads on the second shuttle and played: I rushed, of course, like for all my tests, and one bead remained without the outer chain: 


Wednesday, November 20, 2013

Snowflakes this time

I got into the Christmas fever. Last week I went to a small craft fair here, in Puerto de la Cruz and I found out the conditions to present there my work. Nothing so scarry. But I only need to tat some more little things at least as duplicates. This week end will not hapen, but the next ones I want to go... Unlike most of you, I never saw the reaction of actual people in front of a table full of tatting. Would they even stop in front of it?
Since Christmas is almost here, I really have to rush with this kind of pieces.
I will have to re-do some of the ones from last year. It is crazy how long they can take to make a decent amount of them!


The last ones you maybe know already. I am not quitet anymore about what I do.
For this one, you have the pattern here, in the blog:

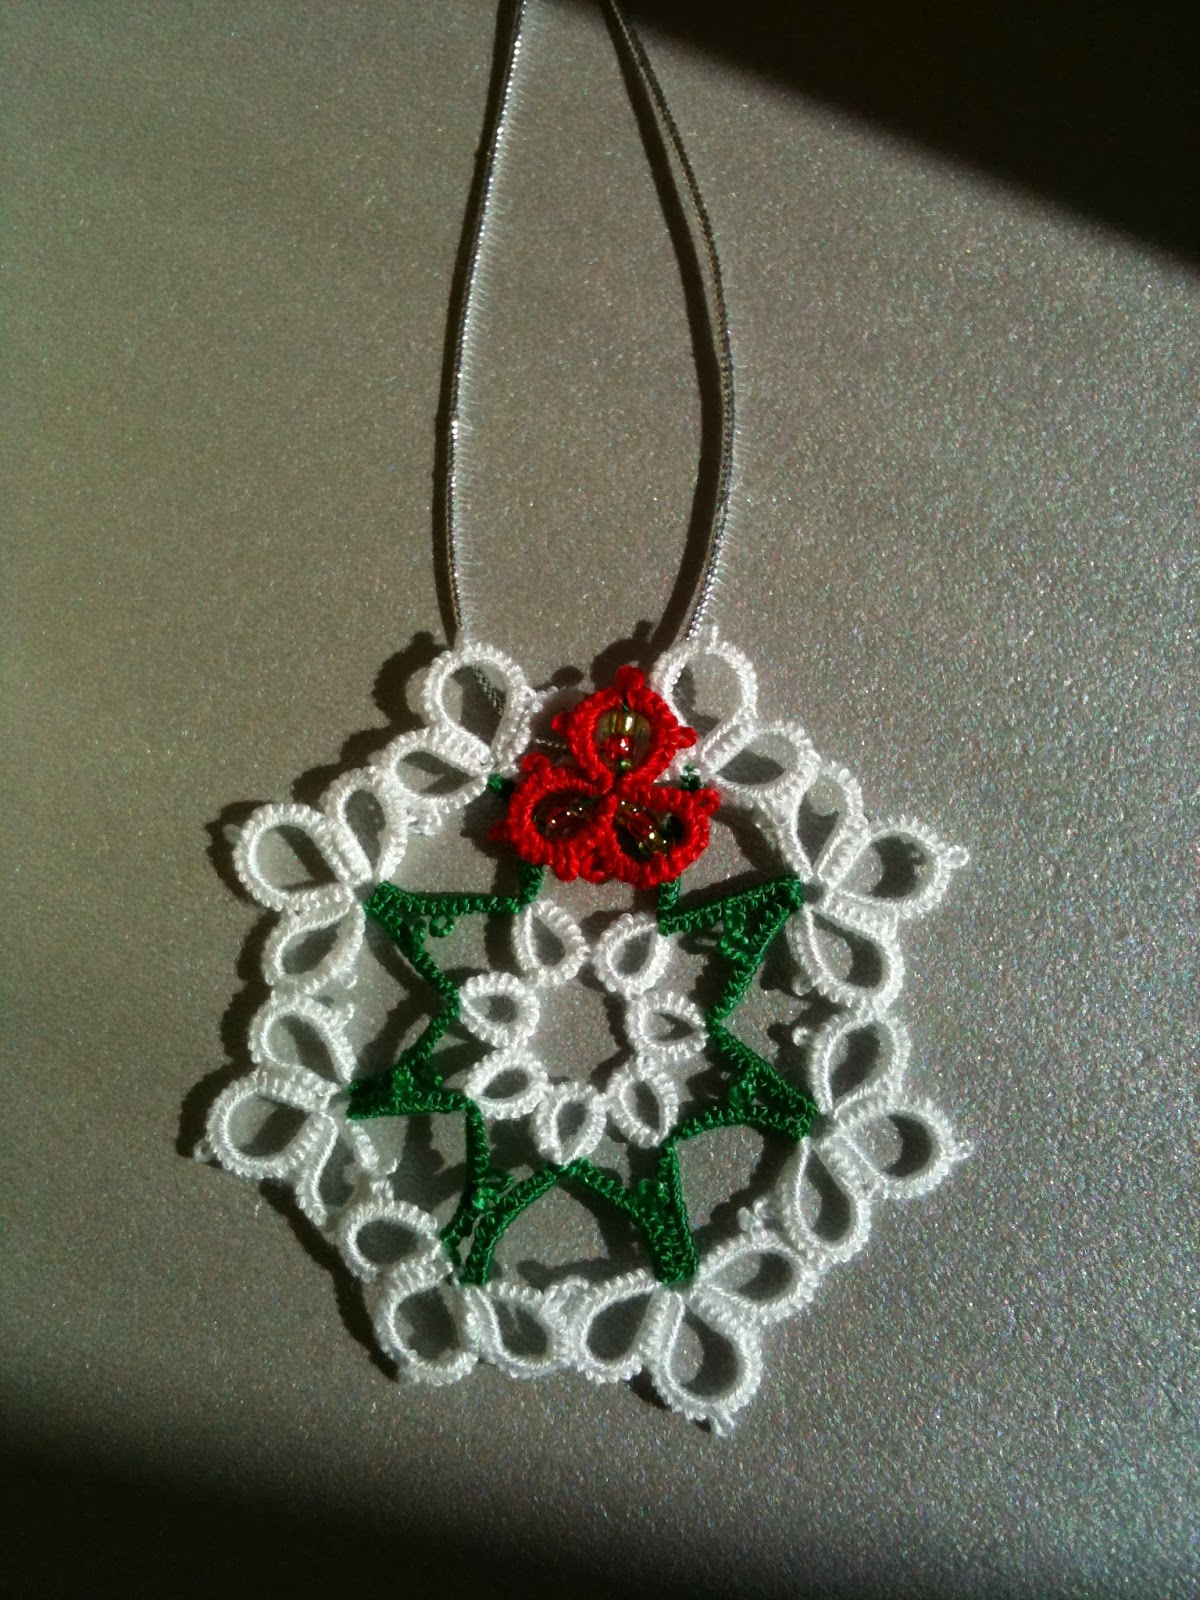
While making a test with this pattern, with green thread this time, some more size 15 Toho beads, I decided that I can try to make some funny xmas earrings. They need some more pearls or cristals... But they look festive. 


For this one, there is my ETSY pattern:
 
As for this little one, I used a patchwork button, poinsettia flower... It misses a bit of red or some glitter thing, have to think about it. I thought even that is would have a nice apearence on an organza present bag. 


Tuesday, November 12, 2013

Snowflake pattern

Since some time I want to start to work some little thing for the holidays... The normal little stars, snowflakes, a small wreath. All good intentions, everything planned. And then I opened my beads box. Big mistake! I got the idea to use bugle beads. Never tatted with them before, so, why not?

First was the traditionl drawing... I was tempted to scan it but then I remember what my son told me: "Mom, you were good in geometry, but drawing it not your strenght." He gave me some ideas too. Funny how a tatting free mind can lead to nice tatting ideas. His idea will come too, because is quite nice and challenging.

I tatted in a hurry this:

I was really affraid that I copied at least partially the Ice Queen of Frivole, but no, I had the confirmation that I did not do it. So I can now post the pattern of this star... or snowflake... you tell me what it is. It is not difficult, the only thing wich can disturb a beginner are the paper clips to hold the beads. You can skip them, bu measuring correctly the very large picots you will have to make.

You will need 2 shuttles, 12 bugle beads, a paper clip and a fine hook.
First of all, this would the way you add the bugles. I hope it helps.


Then the pattern. It has 3 rounds. The first 2 rounds are here.

Round 1
Ring: 6 ds s times with 5 small picots in between.

Second round: 
Split ring: shuttle 1: 6 vlp (2 bugles) 3 ds. repeat the same with the second shuttle. Do not turn work.
Chain: 16 ds (you can adjust to 18). Turn work.
Start ring: 3 ds join to the bugle picot 6 ds join to the ring 6 ds vlp (2 bugles) 3 ds, close ring, turn work.

You have then to repeat this sequence. You will notice that the bugles are a bit longer than the chain. At least, with my thread, it was like this. So make sure the are all on the same side of the work.


After the last chain, you have the rosette done. Make lock join and move to the next round.


Third round
This one is also easy.
Chain 16 (you can add more or make less). Turn work.
Start ring with the core thread: 6ds join in between the 2 bugles 6 ds, close, turn work.
Take the other shuttle and work the trefoil.
Finish with chain 16 and make lock join.

Hope it is understandable.
You have to adjust the ds according to your thread (and the bugles!) I used Frecia 12 and 5mm long bugles. Try to make sure that the bugles have the same size. In my case I had to choose them... And do not rush like I did... If not, the trefoil will not be that nice and the second part of the chain has not a nice start.
The snowflake is stable due to the bugles. Formine, I just have to fix it a bit, because of the uneven small rings. The next one was already better.

Hope you will like it and you will have no problem to follow the pattern.


Saturday, November 9, 2013

Virtual Showroom of Revista Promocionarte

She's keeping us buzy! Carmen from Revista promocionarte found a way to gather crafters from all Spain for 2 intense days of promotion. Not only she is hosting a lot of us in the blog, she's also keeping us moving. In these virtual showrooms like this one we meet, have a peak in the other one's closet, way to say it.


And sometimes I find stunning pieces like this bag from Belum Complementos:


The more I look at it, the more I want to make a tatted bag, clutch, something. Thing is I never did something like this, I know how to attach the mechanism... But knowing and doing are too far away a part.

What you have to do is to post a picture of your work, the links (ok, of course be fun of the page) and then share, share, share. Not only your post, but the other ones too. This is actually the trick wich puts us toghether.

Fun fact: I always wonder, every time I see a nice, neat piece, how much time, work, hope and energy is invested in it.
Funnier fact: There is no tatting to see in there.
Sad fact: that there is no right price for such a work. At least not in Spain. But I know I am not the only one complaining about it.

This time I had this as promotional picture. My last pieces could not miss.


I tell you, I still have one an half days of fun: sharing, sharing, sharing. 
Thank you again, Carmen. 


Simple pattern for the bracelet white and silver

This is what I like with tatting: thre is always something to discover, to test, to try. It is not only the calming effect. How many times did I curse when I did a mistake I could not undo??
The word would be challenging. And rewarding. You know, that moment when you make the last double stich and your eyes are searching for the scissors? And then the little pice of some centimeters square (your worked for it some good 40 mins if not longer) lays in your hand and you say to your self: "Yup! I made it!"

So back to the bracelet I posted yesterday in Facebook... I played this time with a very basic edging, (what else?). Experimenting, tweaking, testing threads... It gave this: the white one were the first attemps, the black one has no picots for the exterior rings... It looks nicer, in my eyes. Both done in poliester thread Brildor 15.


Then I thought, what would it be if I make it in 2 colors? I had, after all, a rest of some silver thread already on my bobbin (strand of 3) so I used as second color a thread from Brildor, the 40, strand of 3.

Since the threads have different consistency, they behave differently and the effect surprised me: the lace has the stiffness I need and the white waves give a nice line.

The result :


I worked it with 2 shuttles. 
The pattern is easy to follow: 
All rings are 6-5-6, done with the silver metallic thread. 
All chains: 14, except the ends, white thread. 

Ring : 6-5-6, close, turn work 
Chain 14, turn work 
Ring 6 + 5 - 6, close, do not turn work
Ring: 11 - 6, close, turn work
Chain: 14, turn work... 

The only thing you have to take care of is to thake the right color for each element you will do. And, of course, not to rush, in order the make a neat colour transition. In my piece, I tried to carefully place the silver thread on the right side or on the wrong side of the lace when I started the next element. 

When you reached the needed lenght, then you use the following pattern: 
Chain 14 - 3 turn work
Ring 6 + 6 (join to the join picot from the braid). 
Ring: 3 + 14 - 3, do not turn work
Chain 3 +14. 


Of course, you may consider starting from the small 6-6 ring. Like this you can finish the lace with  the 3+ 14 + 3 ring and hide the thread you will not need anymore.


This would be it. Easy pattern for a newby... 
Just enjoy if you decide to work it and please let me know if there is something to improve.